
In this article, I will shortly explain how to setup Garvuino with “the synth“. I will not explain here how to customize wavetables but I presume that it will be done in a future article.
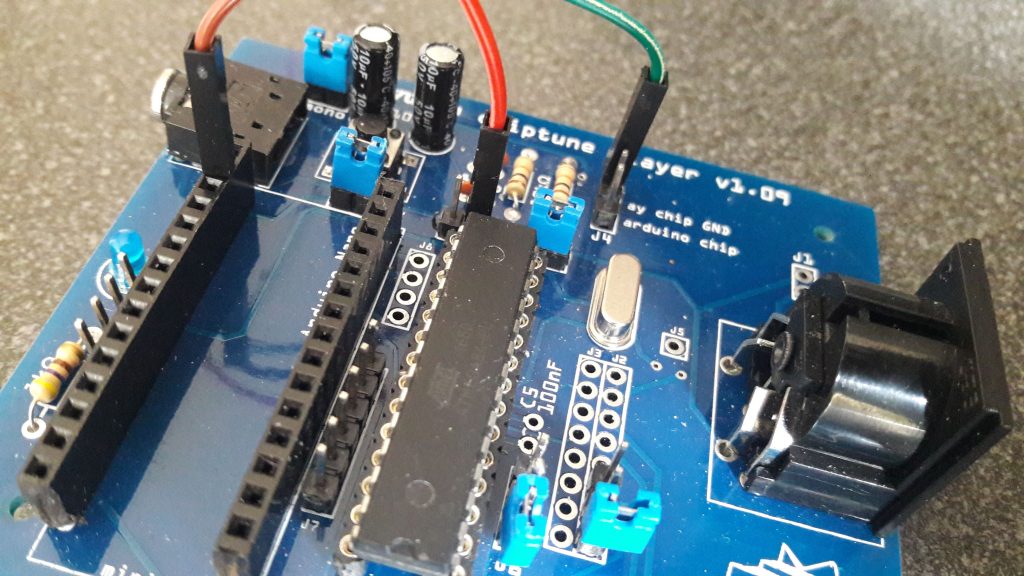
As I’m using garvuino 1.09, once again, the Arduino Nano has to be removed from its socket, thus, some connections have to be setup between the Nano and Garvuino :
- Nano GND PIN to the top PIN of J4 on Garvuino (green cable on the picture)
- Nano RX0 to the second hole of the left socket of Garvuino (brown cable on the picture)
- Nano D3 to the left PIN of AY>L on Garvuino (red cable on the picture)
Plug the Nano to the USB power cable and the mini-jack to your sound input (your soundcard line-in for example).
Then, you can tweak /arduino_sketches/others/the_synth_midi/the_synth_midi.ino and map some rotary pots to a midi controller.
With gmidimonitor, you can find the cc values of 4 rotary pots and configure these values in the sketch :
#define mWave 10 // pots 1
#define mEnv  11 // pots 2
#define mLength 91 // pots 3
#define mMod  93 // pots 4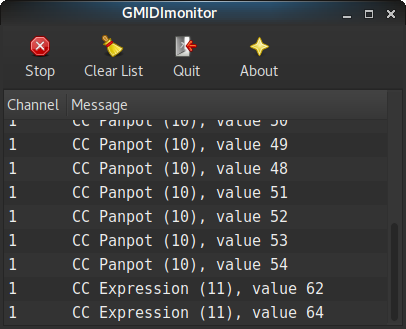
Upload the sketch and plug your MIDI IN to the Garvuino. If you turn the 4 pots on your MIDI controller, the RX LED should blink on the Nano and if the audio is properly configured, you may even hear some sounds !
Here are some examples (some noise reduction, normalization and compression have been applied in Audacity) :
In this file, you will listen to 3 differents hi-hat, kick and snare and 2 sound effects. You might be frighten by the last one so don’t push the volume too high !
Thanks again to Garvalf for his help and the cool piece of hardware !
Be First to Comment